Wednesday, 14 October 2015

Art Market York - October 2015

Well what a weekend!!

As anyone that takes part in shows you will know these are great events but a bit mad.

Thursday 1st Oct 10.30 am - Set Up
Always a mad time and a feeling of being rushed that you are never going to manage to convert your tiny 2x1meter space into retail beauty!  People always think jewellery is easy to display as its small ...... but that just means there is a lot of it to display!!!  It took me from 10.30-4.30 to set up!

Unloading can be a bit chaotic


Friday 2nd October 10.00 am - Day One show opens to public!
Lots of exciting work to see

 Little cafe area to stop for refreshments


Saturday and Sunday 3rd 4th October - The show continued with lots of visitiors.  Talks and workshops took place throughout the weekend.  I was kept plenty busy and met some great people and chatted with some lovely customers.

Sunday 4th October - 4.00 pm - The breakdown, eaqually as mad as set up day but just quicker!!  It took me about an hour and a half to pack up!! - Overall it was a great show and I look forward to next year..... watch this space!!

Sunset at York Racecourse

*********************************

Tuesday, 17 December 2013

Making Heart Christmas Decoration

This is a fun way to make little Christmas Tree decorations.  I made them as name place settings for my Christmas table and then everyone can take them away and keep to put on their own trees!

1) Start with some Polymer Clay (like FIMO or I used PREMO by Sculpey).  I used an effects type one which was white with glitter for extra sparkle.


2) Take a chunk of the clay and roll this into balls, one ball per decoration.  This also softens the clay ready to use.


3) Roll each ball flat just with a wooden rolling pin (not one used with food) or a plastic rod until its a few mm thick.


4) Using some letter stamps press in the name of the person.


5) Use a charm or button whatever you have to press a design into the surface.  I used a snowflake pattern.  Rubber stamps work well for this too.  The I used a pen just to make a hole at the top ready for the ribbon.


6) Use a cookie cutter (again not one used for food) and cut your shape, making sure the hole is still visible and that your name fits in the middle.  I used a heart cutter and then cut into the snowflake pattern.


7)  There you have your finished design.  Next its time to bake.


8) Pre heat oven according to packet instructions, then lay the decorations flat onto a tray.  Cook according to the packet instructions which is normally on a low electric heat for 15-30 min depending on your cooker.


9)  Thread some bight red ribbon through the top and knot a loop and then you have your finished item.  Lay them on the table or pop them on your tree!

Merry Christmas and have a Happy New Year from Jessica Jewellery Design!!

**************


Tuesday, 3 December 2013

How to Get Your Work Featured on the Front Page of Etsy

Please read on for guest blog post written by Beverley Reinemann with some great information and tips!

For both experienced and novice craft entrepreneurs alike, Etsy is a powerful platform for getting your work into the hands of engaged consumers. With ready to launch stores, a passionate and helpful community of sellers, and such wide brand recognition amongst the buying public, Etsy can turn a once-in-awhile crafter into a household name. However, as the site has grown, so too has the competition, and often it can be difficult to stand out. Unless, of course, your work is featured on the front page, instantly exposing your talents to the sites millions of visitors—no marketing tricks and traffic directing involved.

But how to get there? It may not be as unattainable as you think. In fact, you’re already well on your way if you’ve mastered the basics of the platform. Here, too, are a number of additional steps you can take to get yourself to front page fame.

1. Find Your Way Into a Treasury

Example of a Front Page Etsy Treasury

Front page features aren’t pulled from thin air. They come from treasuries, i.e. collections of Etsy items curated by fellow sellers. There are treasuries for just about every kind of theme, from the more obvious kind, like “Holiday Gifts” to more subtle themes like “Bright Gifts” and “Let It Snow!” Think of treasuries like giant Pinterest boards with an agenda. Getting your products featured here will not only expose your work to a wider following within the community of people who follow that treasury, it also puts you front and center with Etsy admins.

So the real question is, how do I get featured in a treasury?

2. Be Findable
When treasury curators are looking for work that fits their theme, they conduct a search much like a customer would for appropriate products. That means you should have a set of keywords ready to go that are relevant to what you’re selling. Use these keywords when describing your product in your initial listing, incorporating them into tags and titles as well. You’ll also want to make sure you’re choosing the most relevant category, and that you account for differences in spelling by alternating between words like “jewelry” and “jewellery.” The last thing you’d want to happen is to lose out on publicity due to spelling!

On a similar note, you may want to renew your listings every so often so you consistently show up at the top of search results, even when you’re operating in a competitive niche.

Implementing these simple techniques will at most bring you to the attention of a treasury owner who can get your featured on the front page, and will at least bring more customers to your shop.

3. Use Great Photos
Of course, once a treasury curator arrives at your destination, it’s important that they’re impressed with your work—and that can only happen if you’ve snapped some great photos. After all, no curator wants to feature a poorly lit, unprofessional looking product, even if it is the coolest item in the world. Remember, curators are a form of customer, and you want to entice them into engaging more deeply with your products.

Jessica Sherriff Bangle, image often chosen to feature in Treasuries

So, what goes into a great photo? Great lighting, of course. Try to find a sunny spot so you can take advantage of natural light and avoid overhead shadows, which can wash out or yellow your product. Go with a very light coloured background so you don’t distract from the product, and run your shots through a photo editing program to polish them all up.

And, I’ll just say this once: For the love of all that is holy, don’t humiliate your boyfriend. Dude is not a prop!

4. Make or Join Your Own Community
Etsy is all about community. Rarely do you find a seller who rises to the top—either of the front page or of sales records—without engaging with fellow sellers.

As you set up your shop, start by posting lots of questions on forums. As you gain expertise, answer other sellers’ questions and offer support to sellers looking for feedback. The more you vocalize in this venue, the more other sellers will look at what you’ve got to sell, the more likely they’ll be to include you in their own marketing efforts.

Which brings us to the second key strategy for participating in a community: teams. Etsy teams are essentially like groups on sites like Facebook or LinkedIn where artists engaged in similar niches can swap ideas and co-market. In fact, some are created specifically for the latter purpose, hosting meetups and Google Hangouts to brainstorm marketing strategies and attending seminars and shows together.

What does this have to do with getting on a treasury and the front page? At a basic level, any exposure is bound to get you noticed by somebody. And chances are, someone on your team will eventually start a treasury (hey, it could be you!), and they’re much more likely to feature someone whose work they know and love than a complete stranger. So, community pays!

5. Take Out an Ad
Etsy’s reach expands far beyond the site itself to countless crafts blogs and websites like Craftcult and Craftopolis. Posting an ad on one of these sites just might catch the eye of an Etsy admin or a treasury curator, and at the least will draw more eyes to your store. It’s worth setting a budget and giving it a try.

6. Understand the Trends
Of course, you’ll always want to maintain your own unique voice and style; that, after all, is what distinguishes you from your competitors. But sometimes, matching your work with what’s popular can present you with a fun creative challenge, and it doesn’t necessarily have to change that much of you do. If red, for example, is becoming an increasingly popular colour choice and it doesn’t interfere with your aesthetic, well, why not produce a piece of red jewelry that a treasury is more likely to feature on its walls?

The best way to get a grasp of what’s popular is to take advantage of Etsy Trends and Merchandising Reports, which detail what’s currently trending as well as what tends to be a bestseller during different seasons. That’s great to know, as posting a Christmas-themed pendant may catch the eye of a treasury curator in December, but not so much in May. (That’s an obvious example, but you get the point).

The Takeaway
Getting featured on the front page of Etsy is a pretty big deal, one that’s by no means out of your reach. By taking a few key steps that also happen to be great for customer sales anyway, you just might be up on that front page before you know it. Good luck!

Beverley is a blogger and freelance writer currently working at an online marketing company in London.  You can find her on twitter here.

Saturday, 23 February 2013

Enlancer - Susan Fabric Fantastic Q & A

I have long admired the work created by Susan Clark and her lovely designed fabric.  We first met way back at college on our foundation course, we took different paths to University but have kept in touch.   There has been great success with her designs and there are lots of items available take a look at her website - www.enlacer.co.uk -
I thought it would a good blog to interview Susan 10 questions, read on to find out about her inspirations, work etc...

1.    How did you get involved in art and design?
I have always loved art and design, in my school leavers book, my art teacher wrote best of luck, see you when your have come out of your Picasso phase! Think it was a compliment?!! I knew I wanted to take art into further education and after opting to take textiles at foundation course I decided that was what I would follow through to University

2.    What made you choose textiles to specialise in?
My love of texture and fabric I knew I wanted to study design and be hands on practical. At university  I took printed and woven textiles, I initially wanted to specialise in Printed, but took woven textiles instead and I now do both, design fabric, and have an old Harris loom in my living room!

3.    Where do you get your inspiration from?

All around me I love photography working from nature, from landscape, to abstract textures, visiting galleries and checking out latest trends and trade fairs, always find it inspiring to talk to other artist designers and hear what other people are up to! I also keep a pen and paper by my bed, I once had a vivid dream about a cricket design, (I don’t even like cricket), I woke up and sketched it out, the  next day I set up my laptop and designed it from my midnight doodlings. You never know when inspiration might strike! (See pic of cricket image right)....

4.    What made you decide to set up in business?

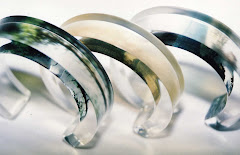
My love of designing and wanting to produce my designs into products, I love interior design as well, and thought my images would work really well as soft furnishings, so I looked into what products to develop, these now include lampshades, cushions, cards, and jewellery printed with my designs………..(see pic of bangles)

 
5.    What one top tip would you give to a start up business?
Research your niche and your market place, find an outlet for your work, don’t start too big, its fine to test your ideas, try online or craft fairs- and see how it goes! Don’t be afraid of a bit of self advertising either, be it creating twitter or facebook or designing your own website and I always have a few business cards in my purse, just in case. Also listen to other people’s advice, try joining a local networking group and ask questions, the more fingers in pies the better.

6.    Where do you sell your products? 

I sell through word of mouth, through local art markets in particular monthly Winchester Arts and Craft market and through my website www.enlacer.co.uk I have recently started up a blogsite enlacerdesign.blogspot and use social media sites https://twitter.com/enlacer https://www.facebook.com/pages/Enlacer/142994412393346


7.    What is your favourite Design or Product from your own collection?
I would say my most popular design is Tulip tree and bird on the wire, and I love my lampshades, I think they are unique and often have comments on how hard it is to find nice lampshades that are a bit different to the norm. Which is lovely, I like to think that’s what I provide!
I think my favourite design is Robin in field and my favourite lampshade design is 4seasons fabric with a gold reflective inner liner. I like it all, including my bangles printed with some of my popular images, they always make me smile.


8.    Name 3 designer makers you admire and why?
Jessica Jewellery Design  – of course! Especially for her wonderful acrylic bangles www.jessicajewellerydesign.co.uk
http://www.margaretsturton.co.uk/  A fantastic animator and illustrator
Oral Kiely I just love her designs
etre_creative interior design company based in Winchester, run by the very creative and inspiring Emily Tyers

9.    What do you hope future?

To continue to be inspired and that my designs become more  available to a wider audience! To carry on enjoying what I do, I love seeing a new design printed for the first time, it’s always so exciting!  To add to my products I would really like to have a range to bags with my images, for the future I would say I’d like to expand my range and brand.

10.    Name one of your favourite websites or online tools?
I often look at http://www.printpattern.blogspot.co.uk/ for interesting trends and designs
I'm always online scouring to find new creative things & Etsy for discovering new talent and fun creative things!

A big thanks to Susan for answering these questions, please do take a look at her site and follow whichever or all social media that you like!

www.enlacer.co.uk
https://www.facebook.com/pages/Enlacer/142994412393346
https://twitter.com/enlacer
enlacerdesign.blogspot
****************************

Monday, 28 January 2013

Winter Walking


Just a few photos from the wintery North East snow.  Was a lovely day out last weekedn but very cold!!! .... Think the rain has washed a lot away now but it was beautiful!


***************************
**********************************

Monday, 21 January 2013

Book Review - How to Make Money using Etsy by Timothy Adam

Well after reading this book I was inspired to get on with my Etsy shop!!  It is a really good book for the beginner and goes over all aspects of Etsy.  Some aspects are already starting to become out of date but would say at least 90% is still very valid so worth the read.  It is really a two part book, half setting up and running an Etsy Shop and half how to start and use Blogs. 

The book starts right from researching your subject, thinking of the right name for your Etsy shop right through to how to sell and promote your shop when you've put it together.  It is very easy to read with good clear language and no real techie jargon.  There are lots of photo snapshots of computer windows to help understand the sites and options mentioned.  The book does touch upon social media including facebook and twitter but blogging is the main form of Etsy promotion Timothy Adam recommends.   This leads to the second half of the book which looks at Blogging.  It goes through how to set up a blog and then what to write about and how to make it work for your shop. 

I already have a shop so a lot of the beginning of the book didn't help me - however I would still recommend that the Etsy shop owner should read this.  For me some great chapters were about the various Google word search sites like 'Google Trends' 'Google Insights' which help with Keywords.  There is also all the information about Blogging -  the writer is a blogger so passes on a lot of information about blogs including lots of great ideas of what to write about.  There are also lots of answers from other bloggers and tips they use.

The end of the book rounds up with some examples of successful Etsy sellers, I didn't get a great deal out of these but again can see how they are useful for a new first time Etsy seller.  They do give tips on how to do your photos and about organisation, they also mention that successful shops can take over your life so be prepared!!

If you have read the book and would like to add your thoughts - or are thinking of buying the book and want to ask a question (i'll try my best to answer) then please feel free in my comments section.


You can purchase this from various places including Amazon for new and used copies
*****************************************

Saturday, 17 November 2012

Collagraph Prints with Hester Cox

Collagraph printing..

This was another class at Rural Arts in Thirsk, workshop was run by an amazing artist, Hester Cox .  The technique involved reminded me a little of etching but its really the reverse!?  You actually add things onto the surface of your 'plate' however we had to be careful not to go too 3D.  I chose to experiment with all sorts of textures and the print below is made up from glue, papers, cutting into things, and then I painted the feather with a white artist paste to give a little relief and texture.

It was then dried and prepped ready for printing.  Using inks you gently add them to the plate and work the colours in just applying with you fingertip.... at first I was worried about this as it looked like a disaster!  However then you start to wipe away the excess ink and the magic start to happen.  The ink you are left with is just what is sunk into the groves and pick up all of the textures.  Next we dampened some paper and rolled the whole lot through a press.

Then hey presto!.......

(The middle pictures show the prints I managed and the original plates that I made.)


This was tricky to do but really good fun so would recommend if you have the opportunity to give it a try, to go ahead.
***************************************


Wednesday, 7 November 2012

Big Bang Bonfire

Remember, remember the 5th of November......

Was at the workshop all day, but took some time out to go to the local Bonfire display, was another great year. Took some photos on the camera with the 'firework' setting (yes there is such a thing!?), which I hadn't tried before. What do you think I think they have come out well... look like weird undersea creatures to me! ... all we need now is a ....ooohhhhhh....ahhhhhh


*****************************************************
***********************

Monday, 22 October 2012

Screen Printing Class

 
I took part in a great taster screen printing class at Rural Arts in Thirsk.  This is my second go at screen printing at Rural Arts and again it was great fun.  After previously dabbling with Christmas designs this time I decided to go with a bold retro inspired apple design.


Image from the Rural Arts Facebook page c/o Rural Arts Images on Facebook
Rural Arts Web page - Rural Arts Facebook

The design I made was quite simple although cutting the stencils is always more complicated than you think, so it took me about 3 goes to make sure I didn't have any loose bits of paper.  Once my design was cut out of paper it was time to get to work on the screen!

We were shown how to set up the screen and mask off the correct area.  Then shown how to create backgrounds (that's how there is some green with some of the images).  I then chose to print my stylised apples just in black to give a good contrast.

Once your set up its a case of go go go! So off the printing went, 2nd image shows the process happening.  I found the actual technique a bit tricky, just to get the right pressure and ink but am pleased with how my pictures turned out. ( The apple images in a row, in image above is a mix of what I managed on the day.)

Rural Arts do a great mix of workshops, do take a look at their site and give it a try!


Image from the Rural Arts Facebook page c/o Rural Arts images on facebook
Rural Arts Web page  - Rural Arts Facebook
 

Sunday, 14 October 2012

Etsy Front Page!!!


So it finally happened!  I made it to the front page, for those of you who have Etsy shops I'm sure you know why I'm so excited!  For those of you who don't it is a big deal because its great exposure.  The front page of etsy always shows a selection of items and these change throughout the day.  The selections are 'Treasuries" these are put together and chosen by anyone out there in etsy, I believe as long as you have an account you can put one together.  So basically you group items you love together and that's your treasury and you can make as many as you want however you want.  Colour coordination usually work the best.  From these the lovely people behind the scenes at Etsy pick ones to put on the page, not 100%sure what they look for but it is connected to themes, colours etc.  It also has to 'look' right.   

As far as helping us sellers it is great as it does highlight your products, however it is pot luck what time you will appear.  I am very excited to say below is a snap shot of mine and it was on for i think the perfect time, the eve in the UK and afternoon in the US.  My Orange bangle is right there.... Click to see.  It got a whopping 410 views in about an hour!  It also meant lots of people looked round other parts of my shop.


So there you go.... I do want to say a big thanks to 'Blue Fennel Vintage' who put the treasury together and chose my bangle to go in it.  I have popped a link into the shop name so you can always have a little browse over the shop.

If you have comments or experiences of the Etsy front page feel free to add them here!

**************************************

Monday, 8 October 2012

Rural Arts Acrylic Workshop

I had a great day teaching at Rural Arts in Thirsk, a 10-4 day long workshop with a little lunch in between.  I started the day giving an overview of plastics and how they are used in jewellery.  We looked though a mix of examples and I gave information about Acrylic which is what we were working with.  Showing how to work with Acrylic was really important so we spent the morning cleaning up, sanding and polishing pieces ready to transform into jewellery. 


Sanding
  
I think the students were surprised how much prep goes into working with acrylics, but realised its worth the effort once the finished items were made.  We went to the cafe and were treated to lovely lunch at the Rural Arts cafe included with the class.

After Lunch it was time to think about decorating the acrylic, I showed various ways to mask the pieces to create patterns.  Then with all safety wear in place we mixed some dye ready to dye the Acrylic prepared pieces.


Care needs to be taken when using dyes.
Washing the pieces well

When the pieces were dyed we took off the masking to reveal what patterns were created.  I then showed the students how to put the necklaces together and fix on the catches.


The fiddly bit......putting your necklace together

This is the final stage think everybody did a fantastic job and created some lovely necklaces, with some great effects!

Some of the finished items by the Rural Arts students, some fantastic effects created!

If you are interested in the jewellery I make feel free to visit my Etsy Online shop.  If you are interested to take part in any future workshops please feel free to join my mailing list on the front page of my website www.jessicajewellerydesign.co.uk and scroll to the bottom.  Also take a look at the Rural Arts homepage. 

Feel free to add comments if there is anything you may be interested in learning how to do, or other ways to work with acrylic.


*******************************************************

Monday, 6 August 2012

The Elevated Envelope

Well this is my first attempt at this. A friend sent me a link through facebook after I commented that what comes through the letter box these days is quite depressing and is normally in the guise of a bill.

Basically you sign up..... get given a theme.... on this occasion 2 months to complete your 10 letters, to a list given to you of like minded folk doing the same thing elsewhere in the world.

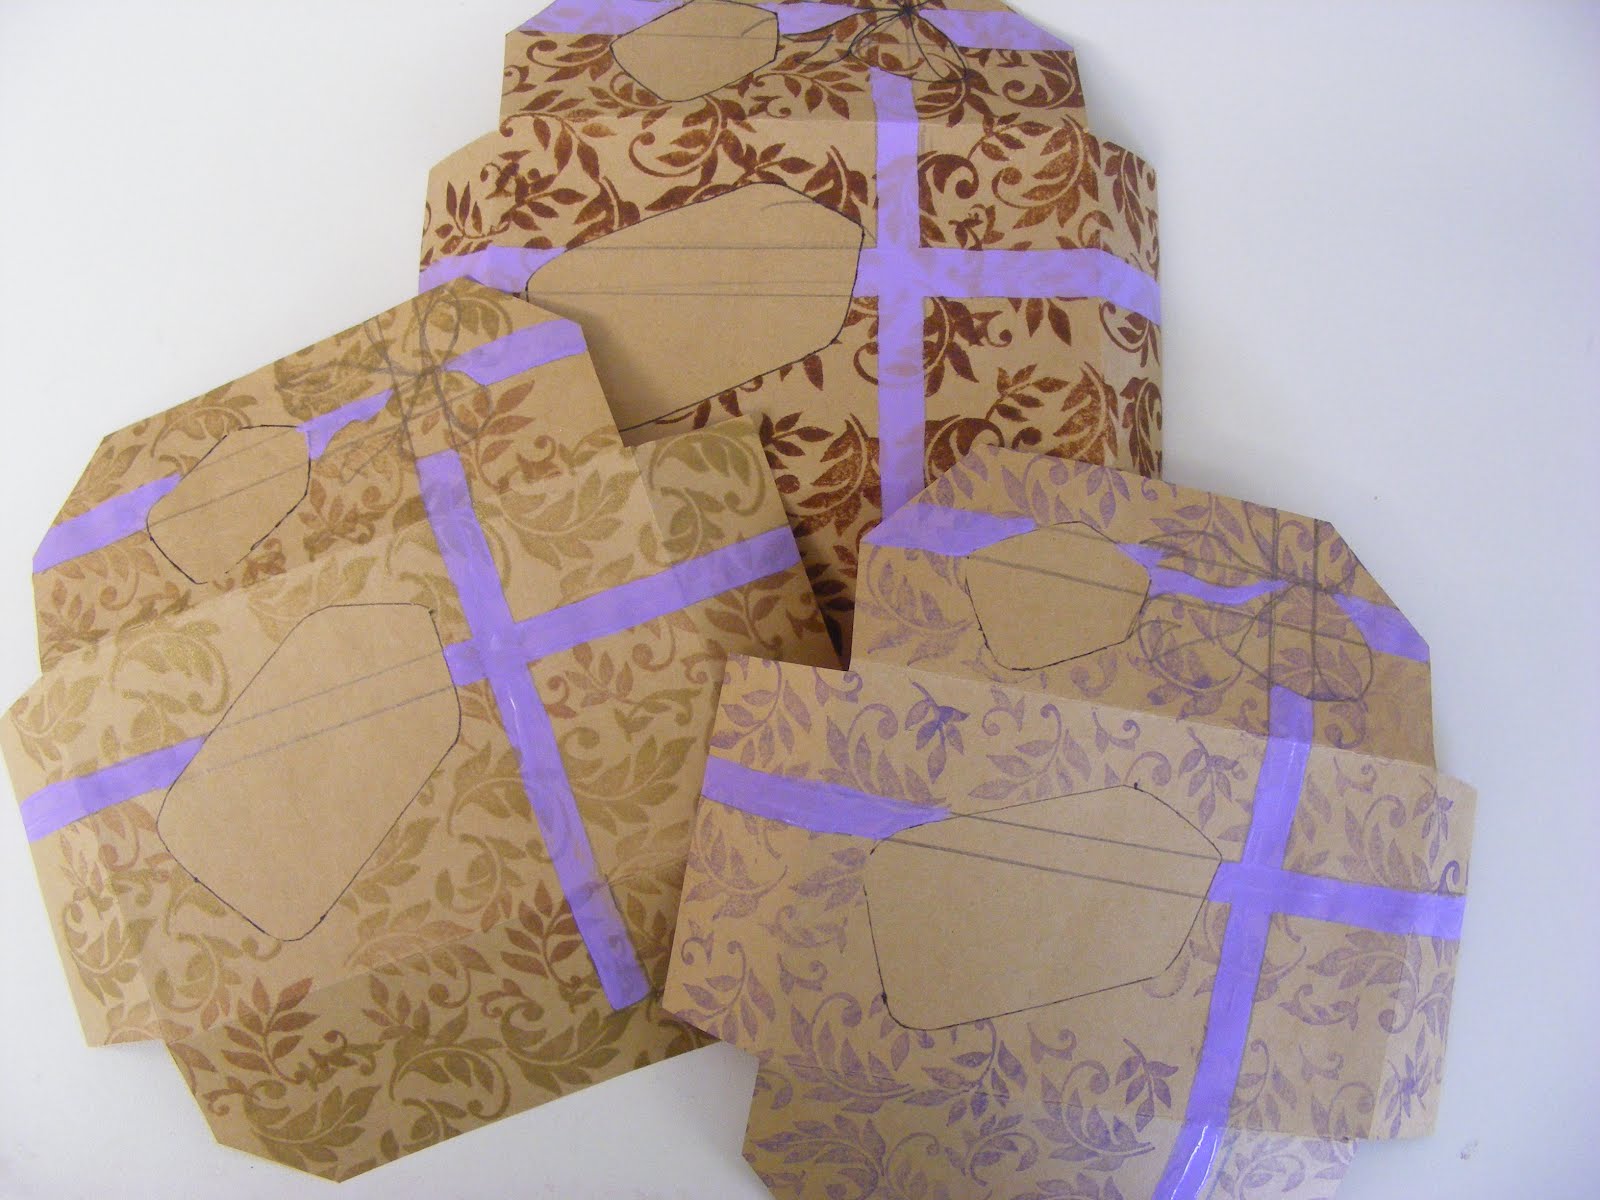
The theme this time was 'Sweet' now that can mean a few things and your are open to interpret this how you wish. I took on the idea of sweet in the uk being the same as candy would be in the US. So after my lovely other half bringing me a lovely box of chocs, inspiration hit..... My 'Sweet' theme would be a box of chocolates.

I decided to make a stamp to represent the chocs to go in the choc box, on the back a recipe for some chocolate truffles. The envelope was to be the 'box' complete with ribbon and gift tag.


I also wanted to make my envelope quite small.... again using the sweet theme I have always loved the old fashioned Jane Austin style letter and so a smaller envelope was made. I then decorated the outside by stamping and painting my ribbon and drawing some tags. I made a few variations just to try.


The final extra was a little 'sweet' heart supposed to resemble and edible treat on a ribbon. These were just made from shrink plastic, drew various designs on them and threaded them up. These can either be worn as necklaces, used as bookmarks or just a little bit of decoration. I hope they have arrived with the recipients ok and look forward to seeing my elevated envelopes coming through the door.


For more information if you want to take part the next time follow the Ephemera facebook page and follow the blog. All organised by Tara Bliven!!

************************************************

Jessica Jewellery Design's Fan Box