Monday 22 October 2012

Screen Printing Class

 
I took part in a great taster screen printing class at Rural Arts in Thirsk.  This is my second go at screen printing at Rural Arts and again it was great fun.  After previously dabbling with Christmas designs this time I decided to go with a bold retro inspired apple design.


Image from the Rural Arts Facebook page c/o Rural Arts Images on Facebook
Rural Arts Web page - Rural Arts Facebook

The design I made was quite simple although cutting the stencils is always more complicated than you think, so it took me about 3 goes to make sure I didn't have any loose bits of paper.  Once my design was cut out of paper it was time to get to work on the screen!

We were shown how to set up the screen and mask off the correct area.  Then shown how to create backgrounds (that's how there is some green with some of the images).  I then chose to print my stylised apples just in black to give a good contrast.

Once your set up its a case of go go go! So off the printing went, 2nd image shows the process happening.  I found the actual technique a bit tricky, just to get the right pressure and ink but am pleased with how my pictures turned out. ( The apple images in a row, in image above is a mix of what I managed on the day.)

Rural Arts do a great mix of workshops, do take a look at their site and give it a try!


Image from the Rural Arts Facebook page c/o Rural Arts images on facebook
Rural Arts Web page  - Rural Arts Facebook
 

Sunday 14 October 2012

Etsy Front Page!!!


So it finally happened!  I made it to the front page, for those of you who have Etsy shops I'm sure you know why I'm so excited!  For those of you who don't it is a big deal because its great exposure.  The front page of etsy always shows a selection of items and these change throughout the day.  The selections are 'Treasuries" these are put together and chosen by anyone out there in etsy, I believe as long as you have an account you can put one together.  So basically you group items you love together and that's your treasury and you can make as many as you want however you want.  Colour coordination usually work the best.  From these the lovely people behind the scenes at Etsy pick ones to put on the page, not 100%sure what they look for but it is connected to themes, colours etc.  It also has to 'look' right.   

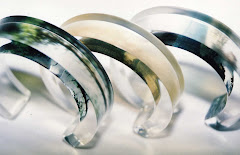
As far as helping us sellers it is great as it does highlight your products, however it is pot luck what time you will appear.  I am very excited to say below is a snap shot of mine and it was on for i think the perfect time, the eve in the UK and afternoon in the US.  My Orange bangle is right there.... Click to see.  It got a whopping 410 views in about an hour!  It also meant lots of people looked round other parts of my shop.


So there you go.... I do want to say a big thanks to 'Blue Fennel Vintage' who put the treasury together and chose my bangle to go in it.  I have popped a link into the shop name so you can always have a little browse over the shop.

If you have comments or experiences of the Etsy front page feel free to add them here!

**************************************

Monday 8 October 2012

Rural Arts Acrylic Workshop

I had a great day teaching at Rural Arts in Thirsk, a 10-4 day long workshop with a little lunch in between.  I started the day giving an overview of plastics and how they are used in jewellery.  We looked though a mix of examples and I gave information about Acrylic which is what we were working with.  Showing how to work with Acrylic was really important so we spent the morning cleaning up, sanding and polishing pieces ready to transform into jewellery. 


Sanding
  
I think the students were surprised how much prep goes into working with acrylics, but realised its worth the effort once the finished items were made.  We went to the cafe and were treated to lovely lunch at the Rural Arts cafe included with the class.

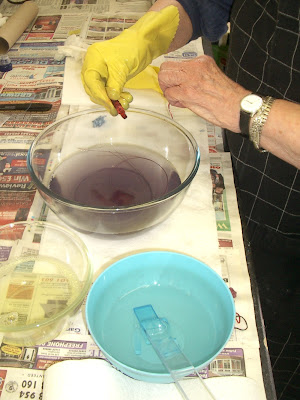
After Lunch it was time to think about decorating the acrylic, I showed various ways to mask the pieces to create patterns.  Then with all safety wear in place we mixed some dye ready to dye the Acrylic prepared pieces.


Care needs to be taken when using dyes.
Washing the pieces well

When the pieces were dyed we took off the masking to reveal what patterns were created.  I then showed the students how to put the necklaces together and fix on the catches.


The fiddly bit......putting your necklace together

This is the final stage think everybody did a fantastic job and created some lovely necklaces, with some great effects!

Some of the finished items by the Rural Arts students, some fantastic effects created!

If you are interested in the jewellery I make feel free to visit my Etsy Online shop.  If you are interested to take part in any future workshops please feel free to join my mailing list on the front page of my website www.jessicajewellerydesign.co.uk and scroll to the bottom.  Also take a look at the Rural Arts homepage. 

Feel free to add comments if there is anything you may be interested in learning how to do, or other ways to work with acrylic.


*******************************************************

Jessica Jewellery Design's Fan Box